• Welcome to Autism Forums, a friendly forum to discuss Aspergers Syndrome, Autism, High Functioning Autism and related conditions.

    Your voice is missing! You will need to register to get access to the following site features:
    • Reply to discussions and create your own threads.
    • Our modern chat room. No add-ons or extensions required, just login and start chatting!
    • Private Member only forums for more serious discussions that you may wish to not have guests or search engines access to.
    • Your very own blog. Write about anything you like on your own individual blog.

    We hope to see you as a part of our community soon! Please also check us out @ https://www.twitter.com/aspiescentral

What was the last thing you made?

It was a real PITA to assemble :D

I had to put the fittings together in stages with the wiring in place. There are several wiring junctions made inside of the plumbing.

The fittings had to be trial fitted one by one. Most of them required running a tap in them to get them to tighten in the right place.
(trial fitted means assembling them only to find out you had to take them apart again sometimes 4 or 5 times)
(another pita part)


A ton of care was placed during the assembly in order to not mar any of the fittings with a pipe wrench.
Nearly all joints were wrapped with heavy leather to prevent scratching them with tools I used.
(like once again, takes forever)


The lamps are flicker flame neon candelabra based bulbs for that open flame effect, the sockets were repurposed from Christmas candelabras, the valves are dinosaur old ones from my stash of fittings, the local area specific ~100 year old gauge was bought at a flea market for $1, the vintage ( I hate that word ) the Fyr Fyter SodAcid bottle was donated to the cause, I had the new old stock sprinkler head in my pile and I invested over $200 in brass pipe and fittings.
(the place where the fittings came from burned to the ground last weekend)

The soda/ash extinguisher has 20 lbs. of ballast in it to keep it from toppling over.

The gauge is plugged and has a Schraeder port in it to pressure it up.
(might get to that later)
(or might not)

I started building this about 4 or 5 years ago but got side tracked from it too many times.
It was about 75% completed the first month, but got stalled for quite a while.
(A special interest I lost interest in, sound familiar?)
(and I had to move it about 1,000 times, did I mention that it's fairly heavy?)

The power cord is threaded thru the nozzle tube.
(that wasn't fun or easy)
(part of why it sat unfinished so long)
(I hated every minute of that last night, but obviously, I got it done)


Yesterday I got bit by that bug again and finally got to see my dream come to fruition. :cool:
 
Last edited:
It was a real PITA to assemble :D

I had to put the fittings together in stages with the wiring in place. There are several wiring junctions made inside of the plumbing.

The fittings had to be trial fitted one by one. Most of them required running a tap in them to get them to tighten in the right place.
(trial fitted means assembling them only to find out you had to take them apart again sometimes 4 or 5 times)
(another pita part)


A ton of care was placed during the assembly in order to not mar any of the fittings with a pipe wrench.
Nearly all joints were wrapped with heavy leather to prevent scratching them with tools I used.
(like once again, takes forever)


The lamps are flicker flame neon candelabra based bulbs for that open flame effect, the sockets were repurposed from Christmas candelabras, the valves are dinosaur old ones from my stash of fittings, the local area specific ~100 year old gauge was bought at a flea market for $1, the vintage ( I hate that word ) the Fyr Fyter SodAcid bottle was donated to the cause, I had the new old stock sprinkler head in my pile and I invested over $200 in brass pipe and fittings.
(the place where the fittings came from burned to the ground last weekend)

The soda/ash extinguisher has 20 lbs. of ballast in it to keep it from toppling over.

The gauge is plugged and has a Schraeder port in it to pressure it up.
(might get to that later)
(or might not)

I started building this about 4 or 5 years ago but got side tracked from it too many times.
It was about 75% completed the first month, but got stalled for quite a while.
(A special interest I lost interest in, sound familiar?)
(and I had to move it about 1,000 times, did I mention that it's fairly heavy?)

The power cord is threaded thru the nozzle tube.
(that wasn't fun or easy)
(part of what it sat unfinished so long)
(I hated every minute of that last night, but obviously, I got it done)


Yesterday I got bit by that bug again and finally got to see my dream come to fruition. :cool:


Well, you've done a brilliant job out there! Now all us little people can look on in awe and be impressed ;)
 
Well, you've done a brilliant job out there! Now all us little people can look on in awe and be impressed ;)
Na, with enough effort and a plan, I believe anybody could have done it.
The questionable part is, will they be as crazy as me for trying it? :p
 
Na, with enough effort and a plan, I believe anybody could have done it.
The questionable part is, will they be as crazy as me for trying it? :p

Fair enough. Although, every time I hear about people making this kind of things for years/after years-long breaks, I remember my own on-hiatus-for-the-last-decade-or-more projects :rolleyes:
 
Sometimes the best way to accomplish a task is to take a step back from it if you can.

Most of the design work I did was generally on a rushed basis with promised deadlines to meet.
That forced your hand to cut corners at times.

In manufacturing you have three ways to approach making a product.
They are good, fast and cheap.
The unfortunate part is that the customer only get to choose two ;)
 
Vegetable soup.

Apple crumble.
(Bought custard)

Family ill with colds and coughs.

A way to get goodness (not supplements) into them.
 
Whole wheat scones:

Not my picture, used blueberries and cranberries.

images
 
Recently I've made a tool that I can use while blowing in canned styrofoam, it's used to keep the styrofoam from slipping/falling into the wrong place, where it sticks like glue.

At the moment I'm making squash soup for lunch.

What things have you made recently? Whether it be art, food, tools or anything of that nature?

I have made a long and beautiful slideshow about our family camping time this summer using Movavi Slideshow Maker Never thought it would be easy to create something like that so fast. Hope my relatives will find it as much cool as I do;)
 
Well, here we are again, showing off a little of my craft.

As some of you are already aware, I have a hobby machine shop in my home. Why?
It's in my blood to create, and nothing gives me a more powerful feeling than to do it with metal and fire.

An older project that was for fun.
I gathered the brass shell casing from an Army-Navy surplus sans projectile. It is a 20mm shell like they use in a gatling gun.
Braaaap!!!
My projectile isn't quite as long as the original because it was hacked out of an old candlestick holder with the tip being made from a stainless steel bolt just for a cool effect.
20 mm round.jpg


Sometimes, shop made tools are made because they can't be purchased.
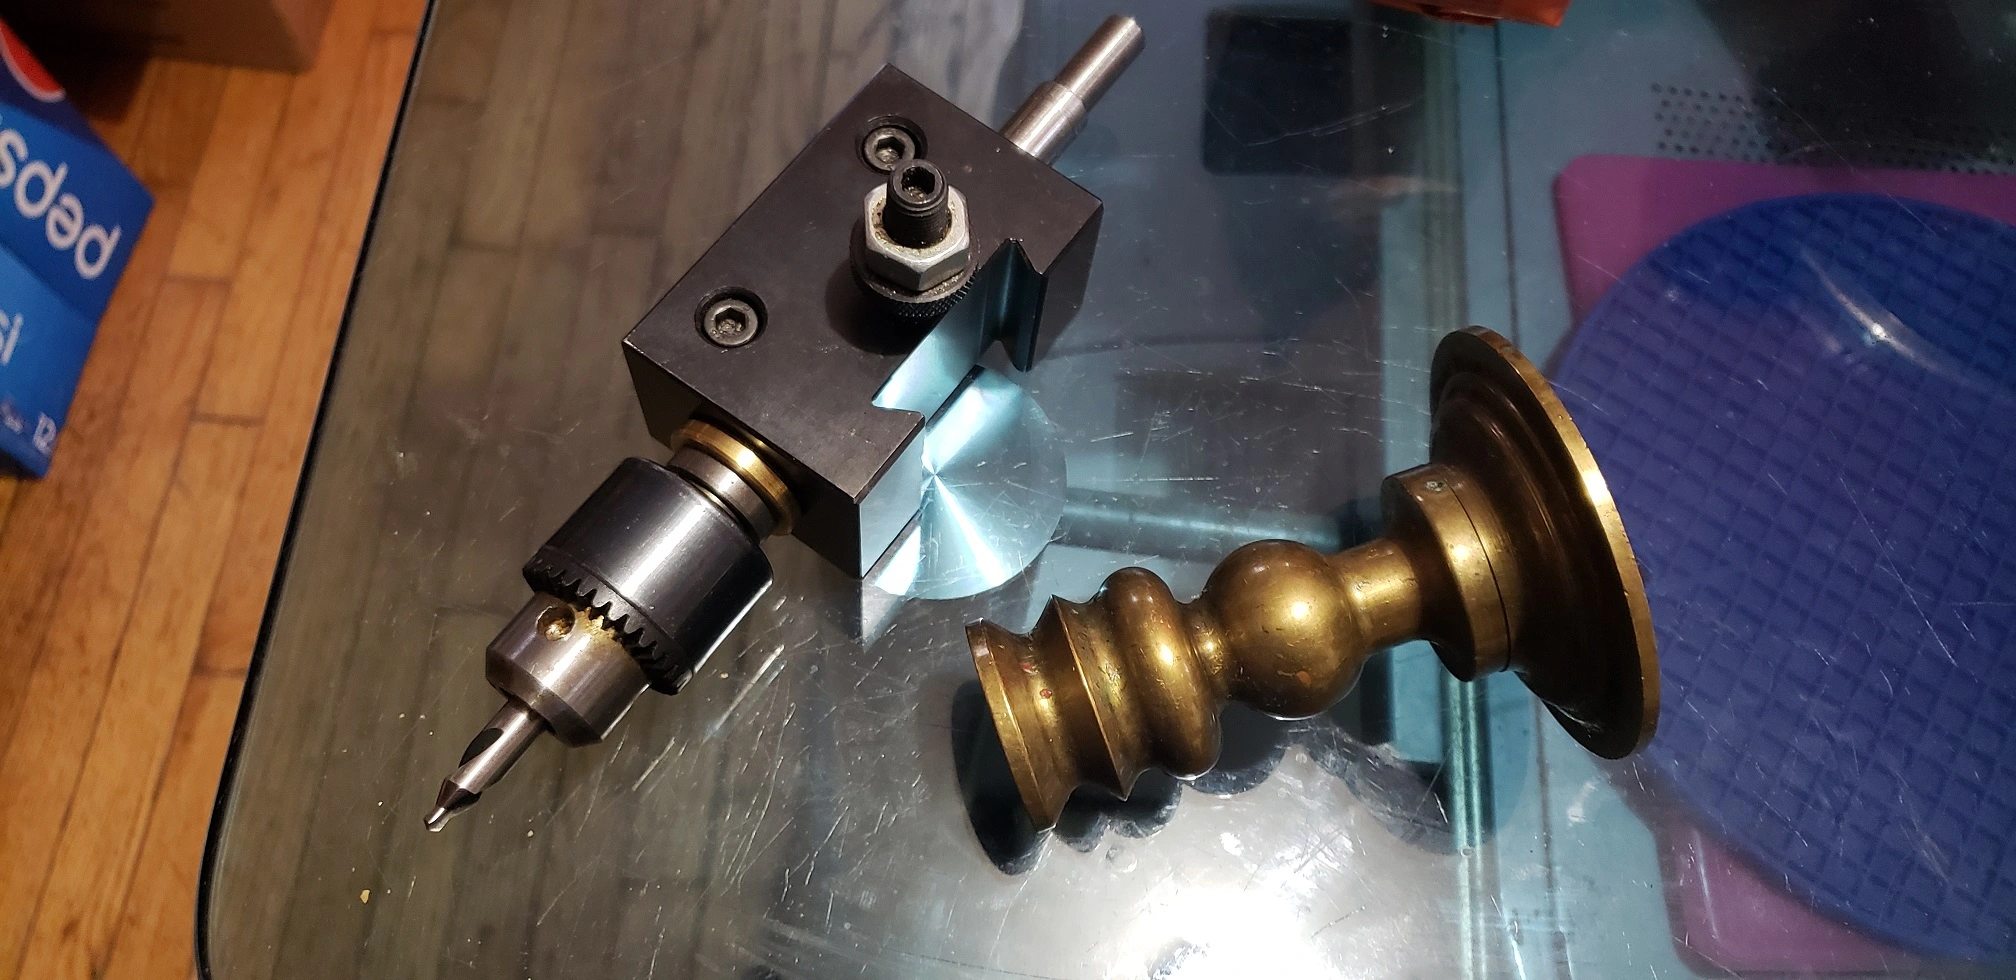
I wanted to be able to drill holes on my lathes that were not on the centerline of the spindle.
I saw several versions of what others came up with and decided I could make mine just a little better.
In the end, I used another brass candlestick holder for the yellow brass housing.
20190206_164643.jpg
20190206_164810.jpg

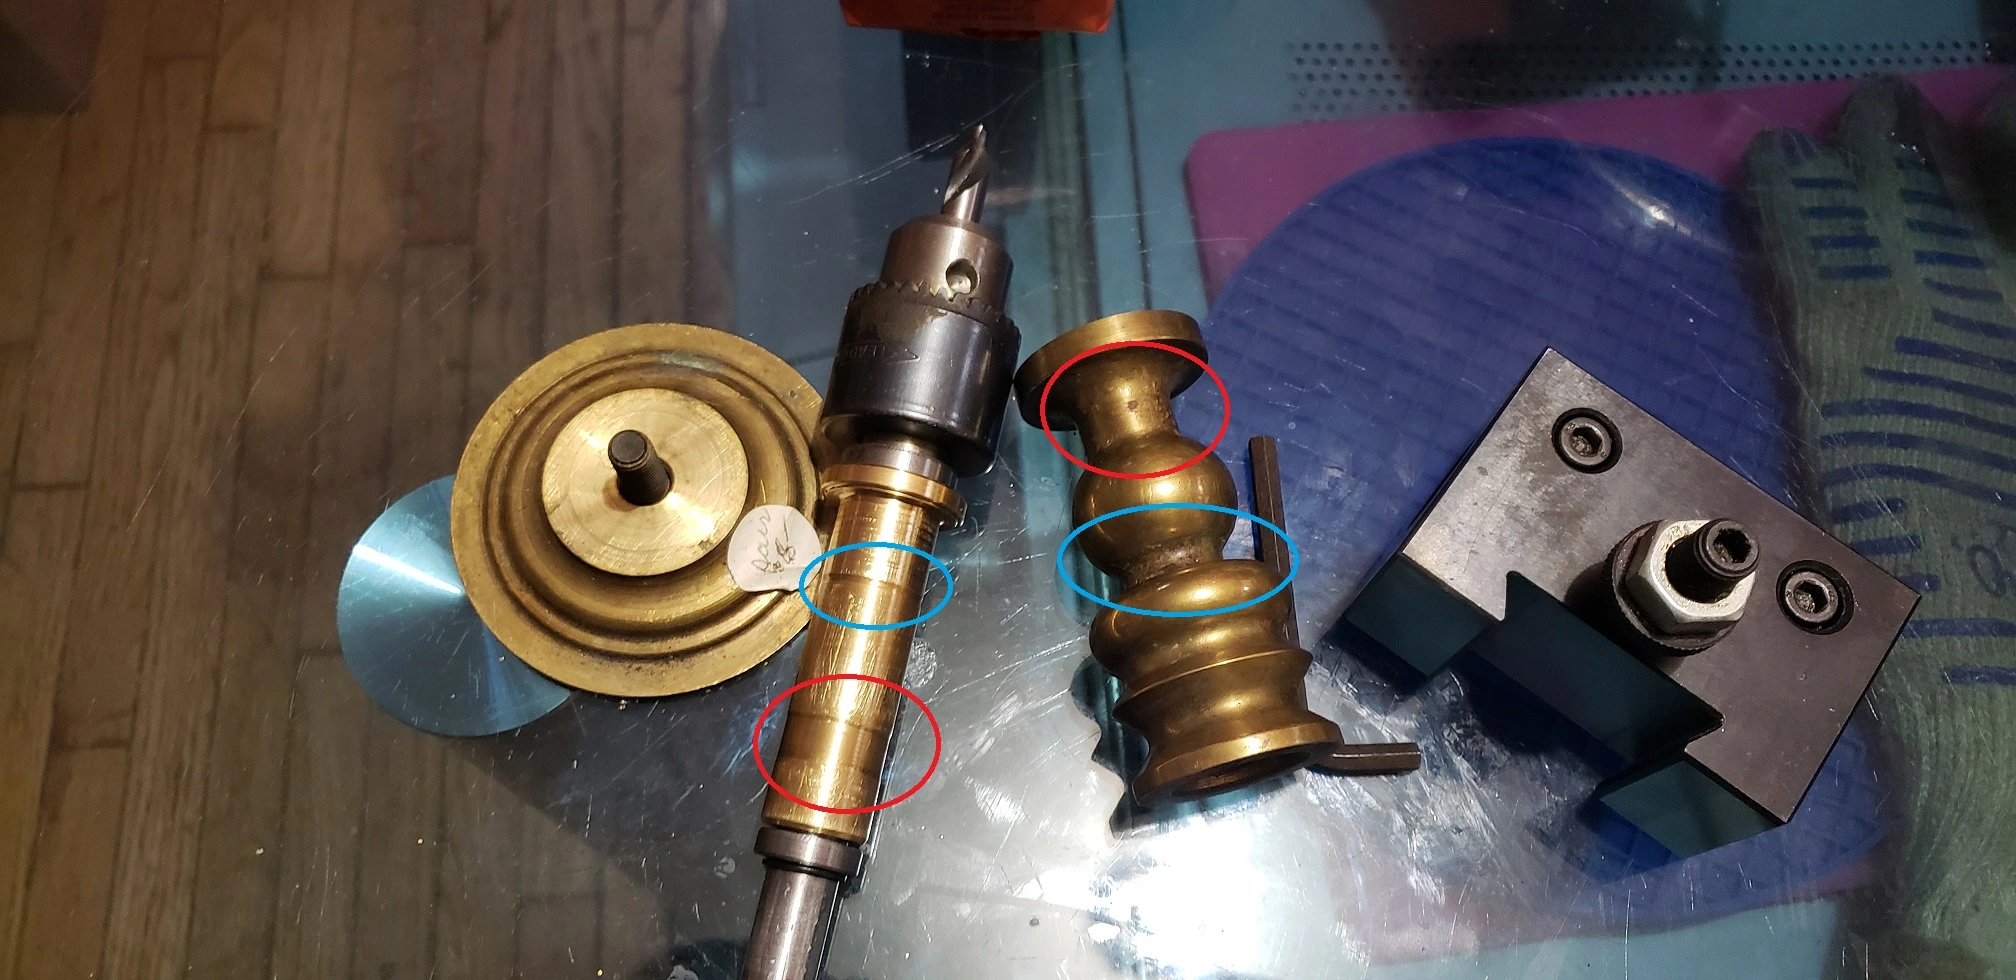
Here, highlighted, are the two places that the original part was turned to a smaller diameter:

No big deal, there was plenty of it straight enough to properly locate it in my boring bar holder for my AXA series quick change toolpost.

Here pictured below are the parts made for the entire design:
Drilling rig parts.jpg


Red, brass housing from a scrap candlestick holder.
Blue, 3/16" thick thrust washers.
Yellow, threaded end to fit drill chuck, a snap ring groove to hold the assembly together and a 3/8ths inch shank so it will fit a smaller drill.
This was a section of old shafting out of something unknown.
Close enough, big enough to be sturdy and well suited for the application.

The thrust washers were made from scrap too.

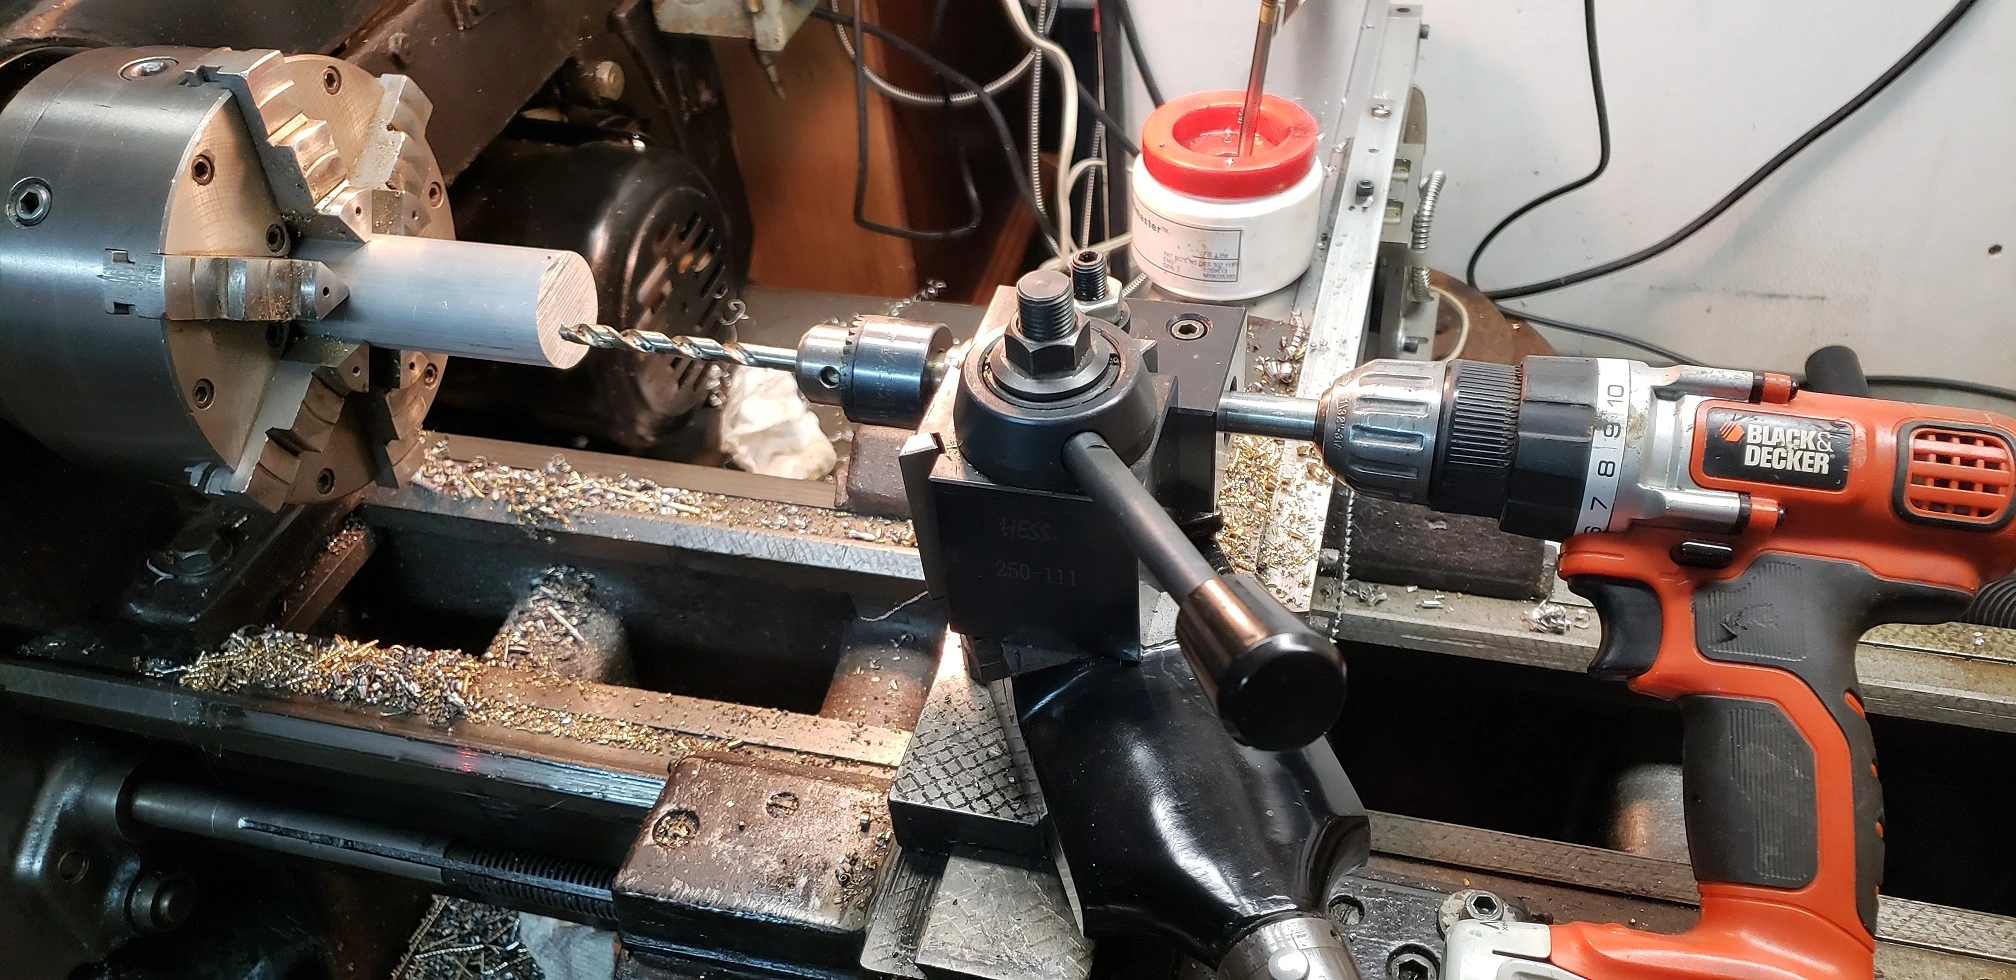
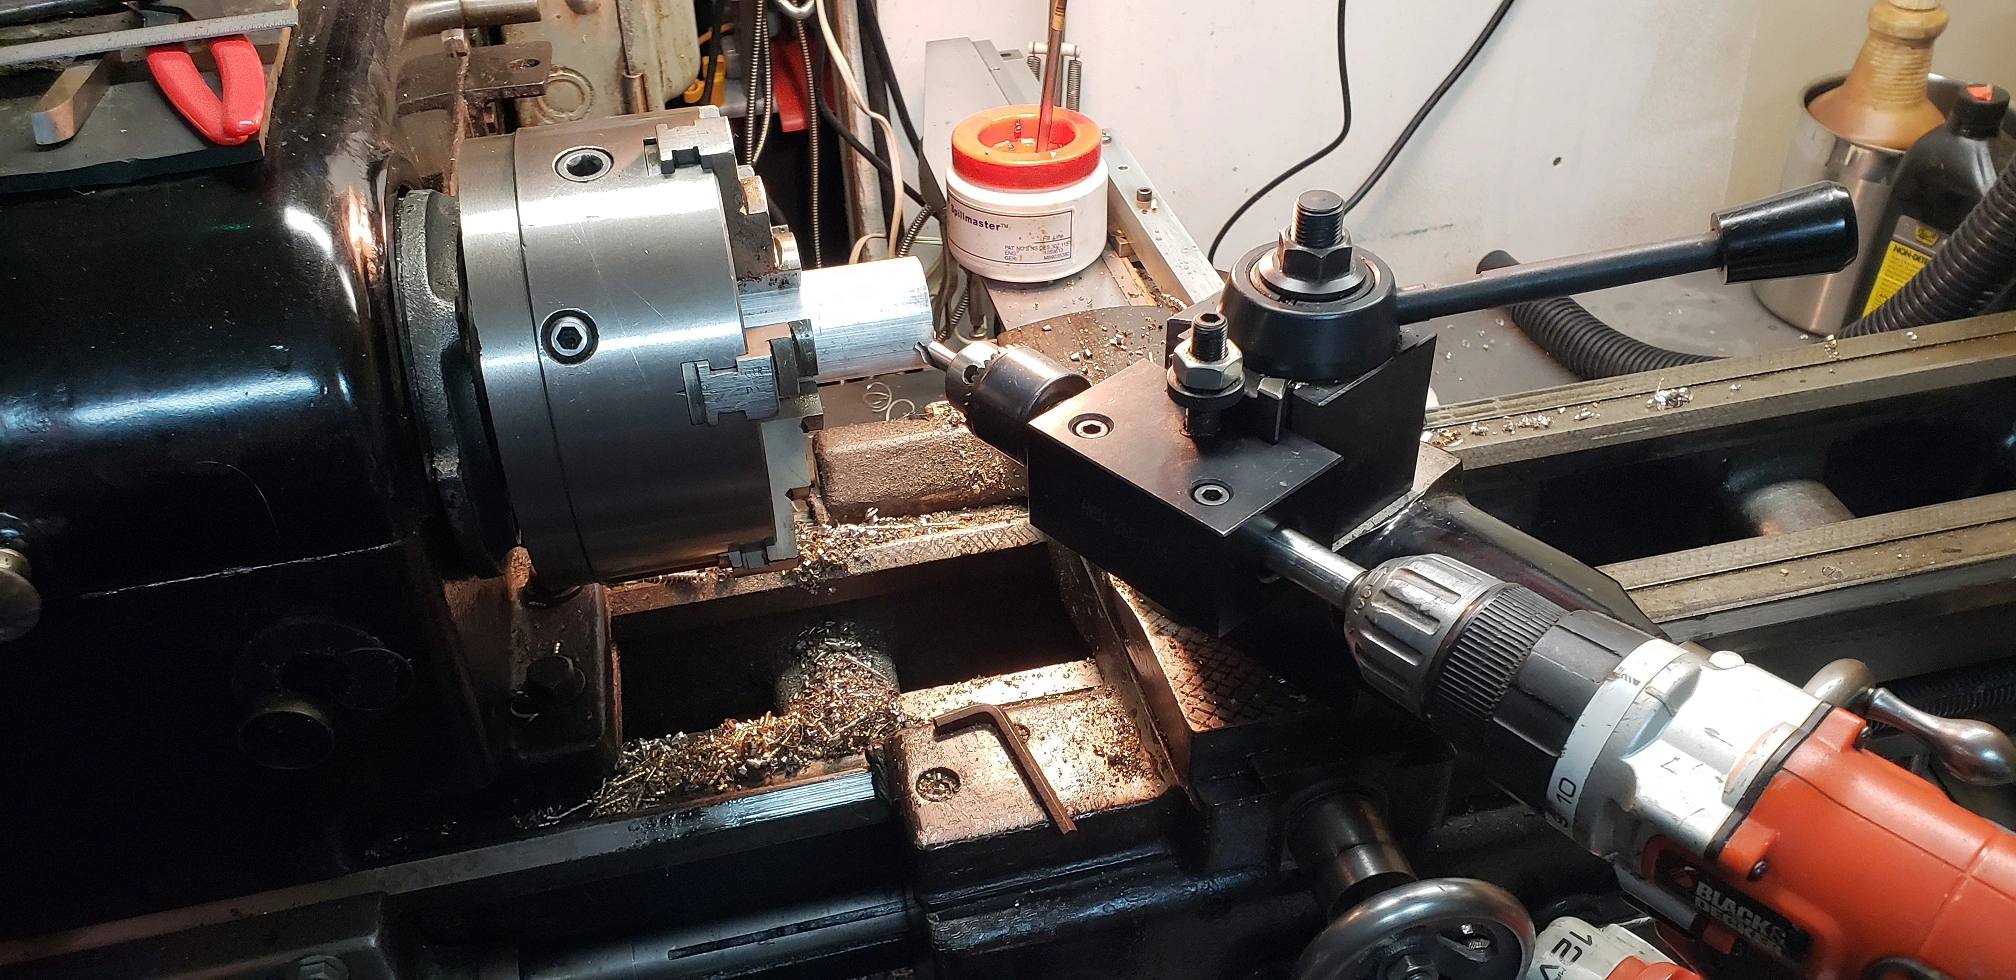
Final assembly in place on a machine:
End drilling from the rear view.jpg

Angled drilling.jpg

It can be turned and locked 360 degrees, fed by the machine screws on the pre-existing slideways and can be monitored for both depth and location in both the X and Z axis.


Pretty slick for a pile of repurposed junk and a $.05 snap ring, ain't it?
 
Last edited:
For the past two days, I have been designing and building a lathe spindle indexing rig.
Often, in this type of setting, tools or mods to machines must be shop built.
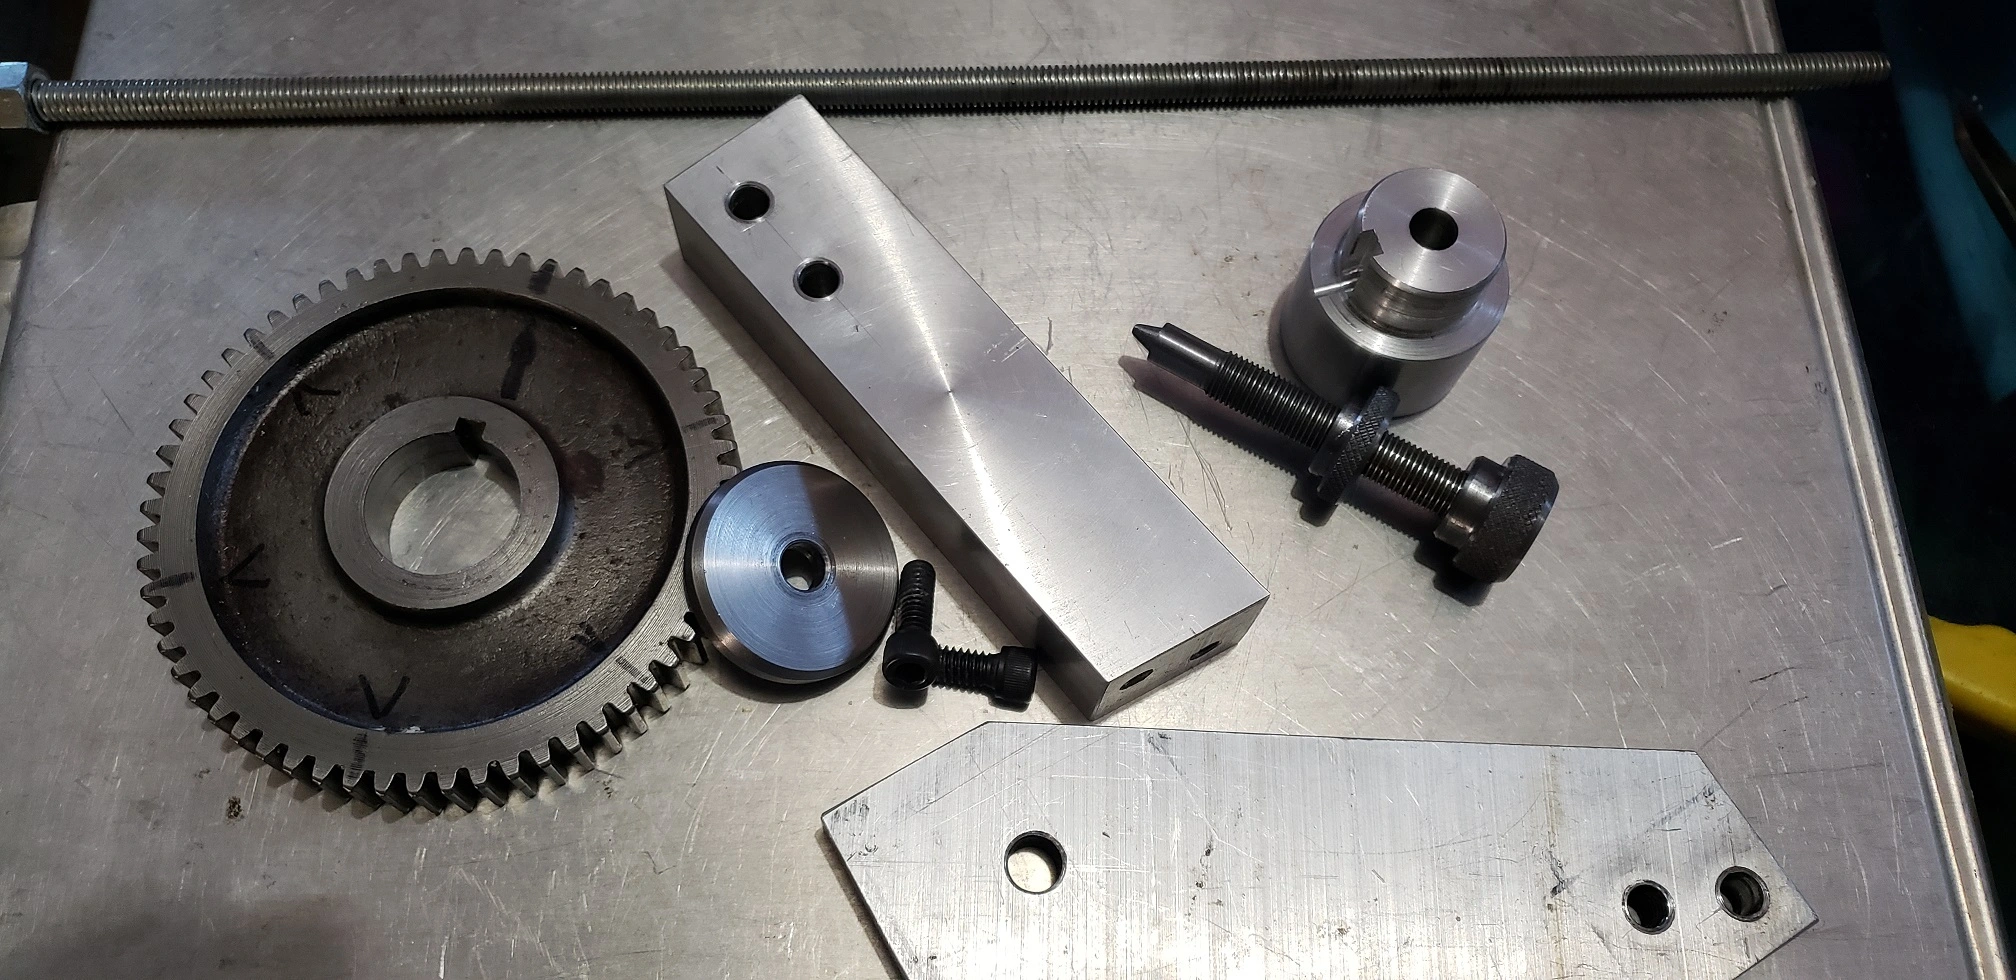
Here are the parts I machined out of raw stock:
The support bar in the center had to be machined at an angle to compensate for how it is mounted.
The round stepped slug to the right fits the inside bore of the spindle to accurately locate it. It has a key seat machined into it to hold the location of the gear to it.
The washer for the gear leaning against it is 1/4 inch thick so it won't get mangled by the drawbolt that holds these parts on.

The flat bracket with the angled ends was designed that way just to be pretty ;)
indexer parts.jpg

Sub assemblies:
indexer assemblies.jpg

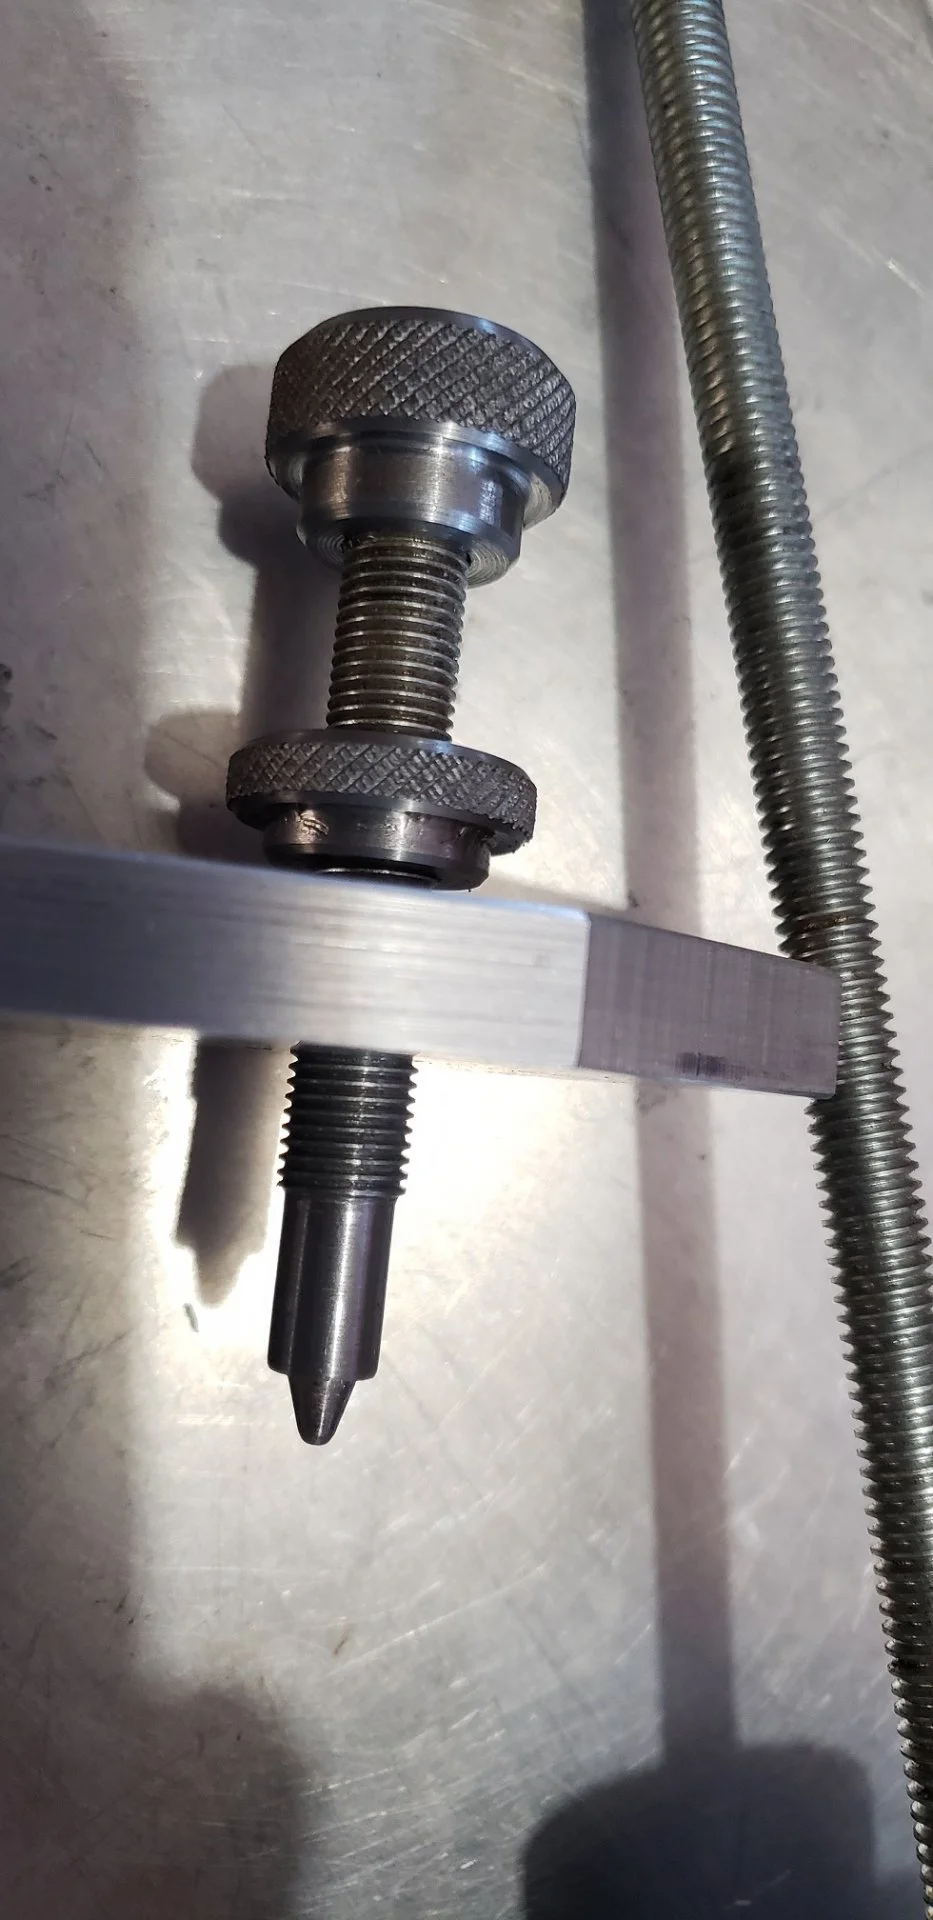
Indexing bolt detail:
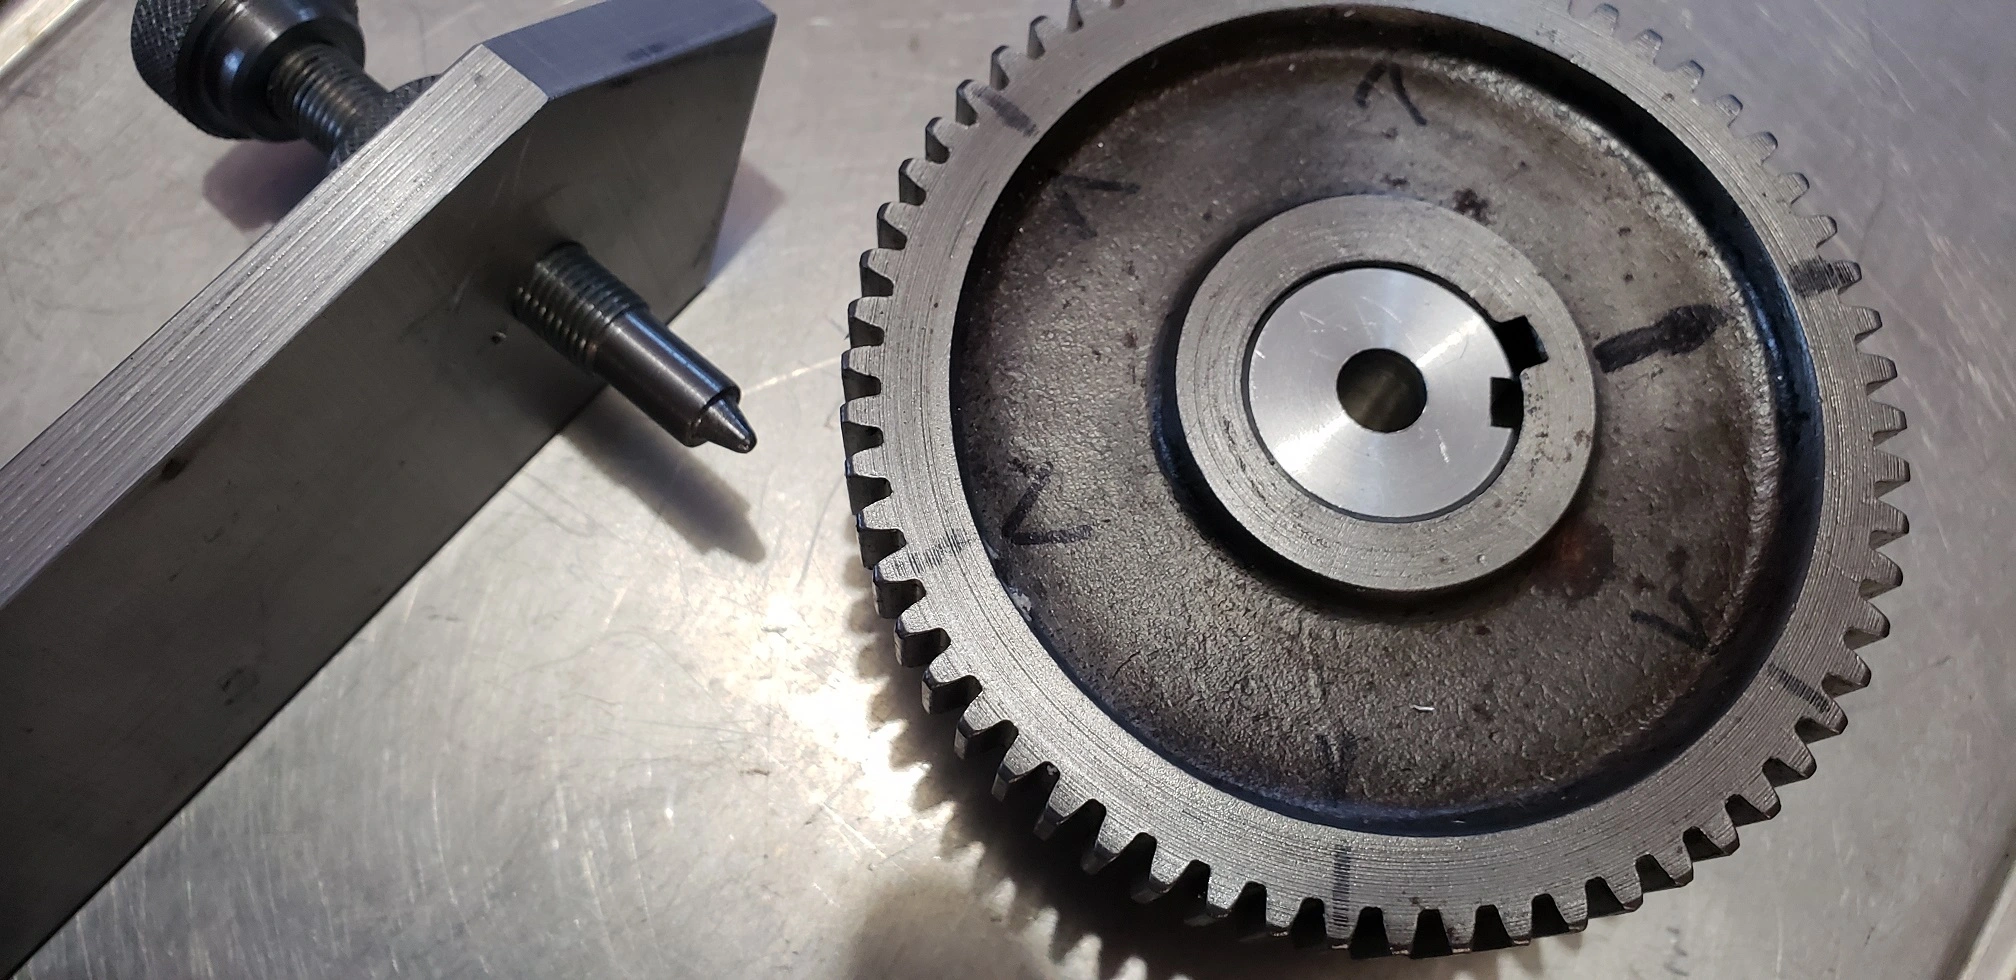
This was made with an end on it that matched the tooth form of the gear.
My knurling tool is very inadequate, but it did leave me something to work with.
A better one will be shop built, but that is a project for another day.
Indexing screw and knurled nuts.jpg

A 60 tooth gear was chosen that offered the most numbers of hole locations possible that were divisions of the tooth count.
Commercial gears are made to very strict tolerances, so they are perfect for this application.
60 tooth gear and locating bolt.jpg

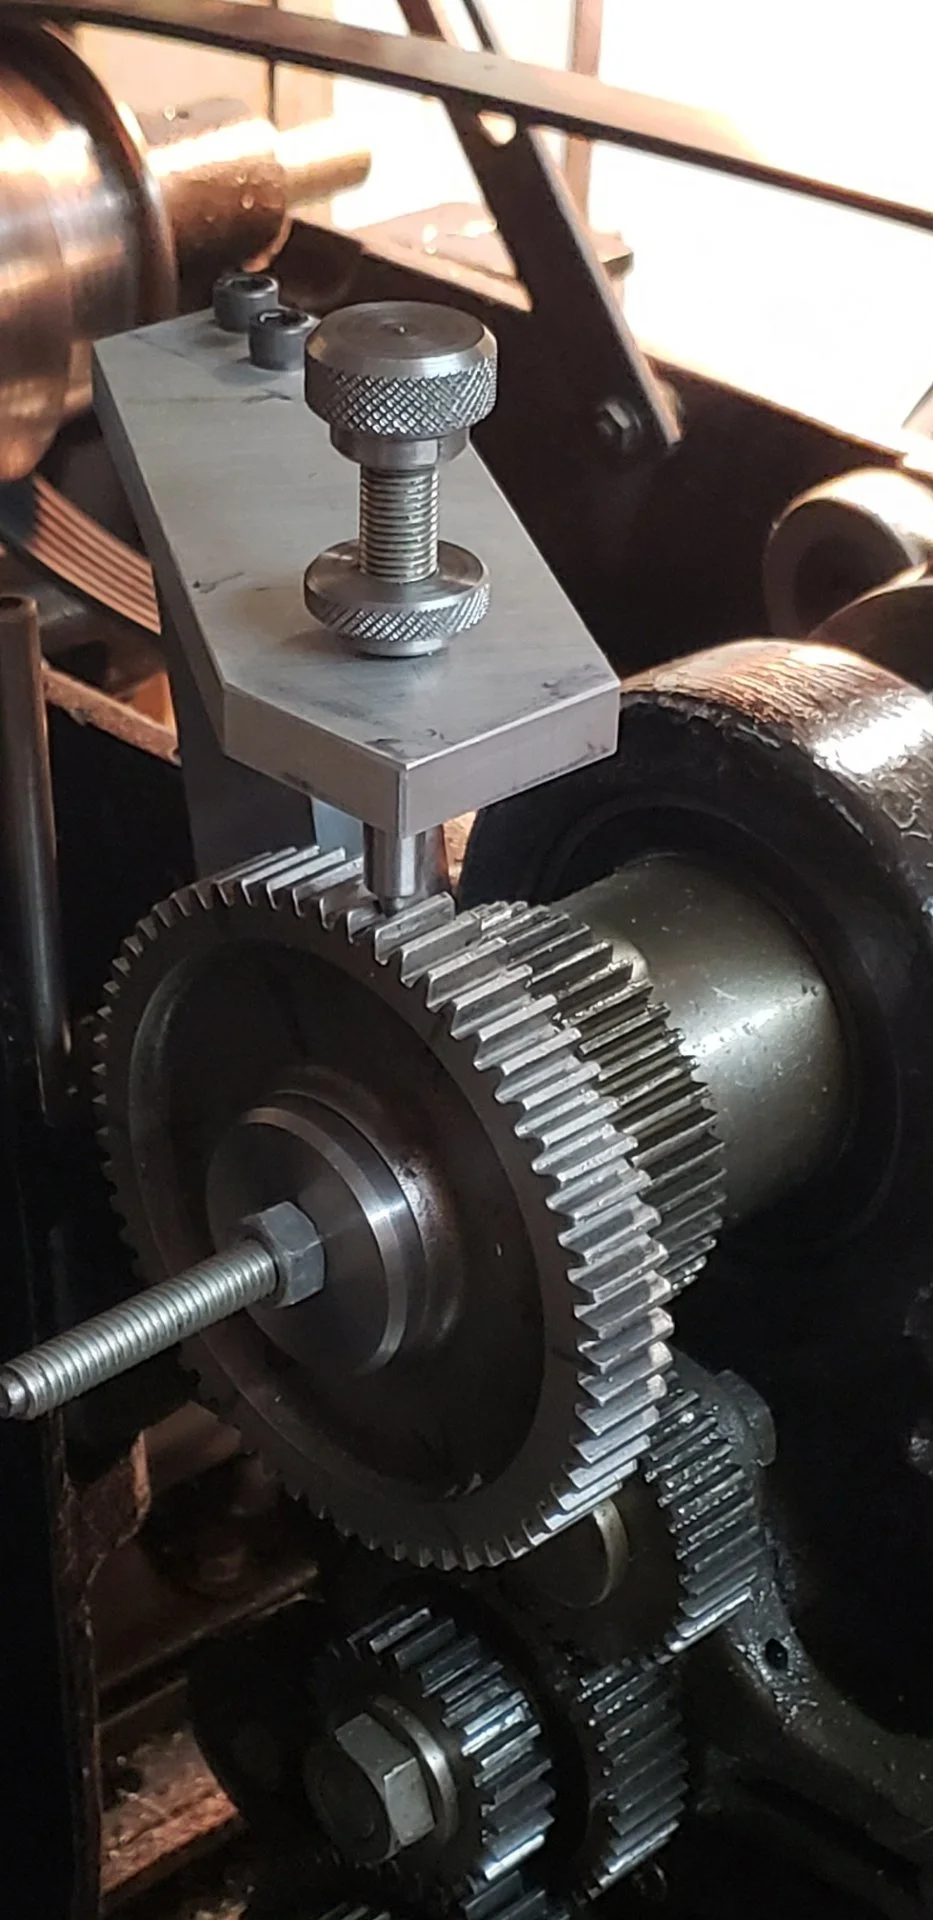
Indexer in place on the machine:
Indexing gear and locating assembly.jpg

The indexing assembly can remain bolted to the lathe as it was designed to fit thru the collet closer's clearance slot in the guard.
Indexer with gear guard closed.jpg


A lathe generally rotates the workpiece in order to cut or drill it.
This setup was made to work in conjunction with the drilling rig feature in my previous post.
Instead of the spindle turning the workpiece, a part held by it can be moved and locked into up to 60 positions while another tool does the machining.
It will allow me to drill accurately placed holes in specific locations that would require very complex setups and tons of time in order to do that type of operation.

I gave a whopping $4 for the gear on Ebay.
The rest of it was made from drops of material that was destined to go to the scrap yard.


In a machineshop, you can continue to make items out of material until it is too small to hold.

Machinists have been recycling since the roots of their craft :cool:
 
After a little more thought was put into the last project, a revised bracket was designed to include a mount for the motor control.
Mounted firmly, easy to reach, and now at eye level.
mount  revision A.jpg

remote mount .jpg


remote mounting post.jpg
 

New Threads

Top Bottom